Advanced system settings
Author: l | 2025-04-24

Open Advanced System Settings. Advanced System Settings can be found in Control Panel, or by searching Advanced System Settings In the System Properties dialog box, select the Advanced tab; In the Advanced tab Once in Control Panel, find the System settings section. Click on System and Security, and then System. You’re now in the right place to access advanced system settings. Step 3: Access Advanced System Settings. In the System window, find the option for advanced settings. Look to the left panel and click Advanced system settings.
Open Advanced System Setting in
8 Using Advanced Settings System Settings Clicking System Settings in the Advanced screen generates the “System Settings” screen, where various system and management parameters can be configured. System Use the “System” section of this screen to configure the following two option Wireless Broadband Router’s Hostname Specify the Router’s host name by entering it into the this text box. Page 117 Actiontec Wireless Broadband Router User Manual Local Domain Specify the network’s local domain by entering it into this text box. Actiontec MegaControl Panel Use this section to configure the following: Automatic Refresh of System Monitoring Web Pages Click in this check box to activate the automatic refresh of system monitoring web pages. Page 118 Chapter 8 Using Advanced Settings System Logging Use this section to configure the following system log options. Enable Logging Click in this check box to activate system logging. Low Capacity Notification Enabled Click in this check box to activate low capacity notification (works in tandem with “Allowed Capacity Before Email Notification”... Page 119 Actiontec Wireless Broadband Router User Manual Allowed Capacity Before Email Notification Enter the percentage of security log buffer capacity reached to trigger an E-mail notification. Security Log Buffer Size Enter the size of the security log buffer in this text box. Page 120 Chapter 8 Using Advanced Settings Auto WAN Detection When activated, Auto Detection causes the Router to automatically search for connection. Enable Logging Clicking in this check box activates automatic detection. PPP Timeout Enter the amount of time (in seconds) before the Router stops attempting to establish a broadband connection. Page 121: Universal Plug And Play (Upnp) Actiontec Wireless Broadband Router User Manual Universal Plug and Play (UPnP) To access the settings perform the following: 1. Click Universal Plug and Play in the Advanced screen. The “Universal Plug and Play” settings screen appears. 2. Click in the “Allow Other Network Users to Control Wireless Broadband Router’s Network Features”... Page 122: Firmware Upgrade Chapter 8 Using Advanced Settings Firmware Upgrade The Router offers a built-in mechanism for upgrading its firmware without losing custom configurations and settings. There are two methods for upgrading the firm- ware: • Upgrading from a local computer - use a software image file pre-down- loaded to the computer’s disk drive or located on the accompanying evalua- tion •... Page 123 Actiontec Wireless Broadband Router User Manual 2. In the “Upgrade From a Computer in the Network” section, click Upgrade Now. The “Upgrade From a Computer in the Network” screen appears. 3. Enter the path of the software image file, or press the “Browse” button to browse for the file, and click OK. Page 124 Chapter 8 Using Advanced Settings Automatically Check and Send E-mail If “Automatically Check for New Version and Notify via Email” is selected, enter the period of time the Router checks for a new upgrade, and the at which to get the upgrade, in the appropriate text boxes. The Router will then check at each time interval for firmware upgrades and, if one is available,
Advanced system setting How to open Advance in
Or Q-Flash screen. Advanced Mode Function Keys Move the selection bar to select a setup menu ... Page 25: Favorites (F11) Favorites (F11) Set your frequently used options as your favorites and use the key to quickly switch to the page where all of your favorite options are located. To add or remove a favorite option, go to its original page and press ... Page 26: Tweaker Tweaker Whether the system will work stably with the overclock/overvoltage settings you made is dependent on your overall system configurations. Incorrectly doing overclock/overvoltage may result in damage to CPU, chipset, or memory and reduce the useful life of these components. This page is for advanced users only and we recommend you not to alter the default settings to prevent system instability or other unexpected results. Page 27 ƒ Advanced CPU Settings & Core Performance Boost (Note 1) Allows you to determine whether to enable the Core Performance Boost (CPB) technology, a CPU performance-boost technology. (Default: Auto) & SVM Mode Virtualization enhanced by Virtualization Technology will allow a platform to run multiple operating systems and applications in independent partitions. Page 28 ƒ Advanced Memory Settings ƒ Memory Subtimings d Standard Timing Control, Advanced Timing Control, CAD Bus Setup Timing, CAD Bus Drive Strength, Data Bus Configuration These sections provide memory timing settings. Note: Your system may become unstable or fail to boot after you make changes on the memory timings. Page 29: Settings Settings ƒ Platform Power & AC BACK Determines the state ofHow to Open Advanced System Settings
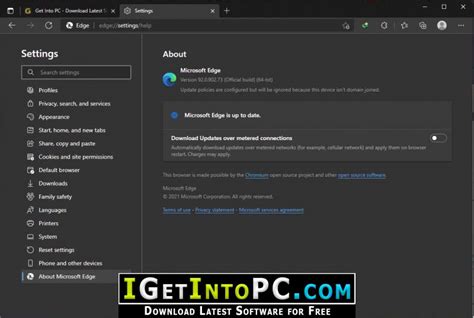
If you’ve ever found yourself impatiently waiting for the Taskbar to appear or disappear while using Windows 11, you’re not alone. The auto-hide feature can sometimes feel sluggish, making you wish for a little extra pep in its step. Thankfully, you don’t have to settle for a lagging Taskbar; there are simple settings you can tweak to speed things up significantly.Understanding the IssueThe Taskbar’s auto-hide function is designed to clear your screen for a more immersive experience, but the default sliding animations can often feel like they’re stuck in slow motion. Each time you hover over the Taskbar’s edge, a little animation happens, adding a slight delay—and for some users, that can be frustrating. If you believe every millisecond counts in your productivity, let’s dive into how you can give that Taskbar a much-needed turbo boost.Here’s How to Change Taskbar Autohide Speed in Windows 11Step-by-Step InstructionsOpen the Settings App: Begin by clicking on the Start button and selecting the gear icon or simply pressing Windows + I on your keyboard.Select System: On the left side of the Settings window, choose "System."Navigate to About: Scroll down on the right side until you find "About." Click on it.Access Advanced System Settings:Method 1: Look for a related link in the "Device specifications" section that says "Advanced system settings."Method 2: Alternatively, you can use the RUN command by pressing Windows + R, typing sysdm.cpl, and hitting Enter.Adjust Performance Settings: In the System Properties window, navigate to the "Advanced" tab and click on the "Settings". Open Advanced System Settings. Advanced System Settings can be found in Control Panel, or by searching Advanced System Settings In the System Properties dialog box, select the Advanced tab; In the Advanced tabAdvanced System Settings Shortcut - Create
Refer to Vmware.com for additional information on setting up and using Paravirtualized RDMA (PVRDMA) network adapters.Prerequisites RDMA must be enabled in the device NVRAM via BIOS setup.Configuring a Virtual Center for PVRDMA Use the following steps to configure a Virtual Center for PVRDMA:Creating a distributed virtual switch (DVS) requires a DVS for PVRDMA.Tagging vmknic for PVRDMA on ESX Hosts To tag a vmknic for PVRDMA to use on ESX hosts:Select the host and right-click Settings to switch to the settings page of the Manage tabs.In the Settings page, expand System and click Advanced System Settings to show the advanced system settings key-pair value and its summary. Click Edit to bring up the Edit Advanced System Settings.Filter on PVRDMA to narrow all the settings to just Net.PVRDMAVmknic.Set the Net.PVRDMAVmknic value to vmknic.Setting the Firewall Rule for PVRDMA Use the following steps to set the firewall rule for PVRDMA:Select the host and right-click Settings to switch to the settings page of the Manage tabs.In the Settings page, expand System and click Security Profile to show the firewall summary.Click Edit to bring up the Edit Security Profile.Scroll down to find pvrdma and check the box to set the firewall.Adding a PVRDMA Device to the VM Use the following steps to add a PVRDMA device to the VM:Select the VM and right-click Edit Settings.Add a new Network Adapter.Select the network as a Distributed Virtual Switch and Port Group.For the Adapter Type, select PVRDMA and click OK.Configuring the VM on Linux Guest Operating System TheDifference between advanced system settings and
Safe mode is a software or operating system mode where most fixes are done. It is a diagnostic mode. Some malware require removal in this mode.For Windows operating systems, you may follow these steps depending on the operating system installed on your computer:• On Windows 7 and Windows Server 2008 (R2)Restart your computer.Press F8 after the Power-On Self Test (POST) routine is done. If the Advanced Boot Options menu does not appear, try restarting and then pressing F8 several times after the POST screen is displayed.On the Advanced Boot Options menu, use the arrow keys to select the Safe Mode option, and then press Enter.• On Windows 8, Windows 8.1 and Windows Server 2012 (R2)Access the Charms bar by moving your mouse pointer to the upper-right corner of the screen.Move your mouse pointer down and click Settings>Change your PC Settings.In the left panel, click General.In the right panel, scroll down to the bottom to find the Advanced startup section, then click the Restart now button and wait for the system to restart.In the Advanced Startup menu, click Troubleshoot>Advanced Options>Startup Settings>Restart and wait for the system to restart.In the Startup Settings menu, press 4 to enable safe mode.• On Windows 10Press Windows logo key + I on your keyboard to open Settings. If that doesn't work, select the Start button, then select Settings.Select Update & Security > Recovery.Under Advanced startup, select Restart now.After your PC restarts to the Choose an option screen, select Troubleshoot > Advcanced options > Startup settings > Restart.After your PC restarts, you'll see a list og options. Select 4 or press F4 to start your PC in Safe Mode.advanced system settings - Microsoft Community
How to Increase Virtual RAM in Windows 10Increasing virtual RAM (Random Access Memory) in Windows 10 can help improve your computer’s performance, especially if you’re running resource-intensive applications. Virtual RAM, also known as a paging file, uses a portion of your hard drive as if it were RAM. Follow these steps to boost your system’s virtual memory.By following the steps below, you’ll increase your computer’s virtual RAM, making it run smoother when handling multiple or heavy applications.Step 1: Open System PropertiesOpen the Start Menu, type "System," and select "System" from the results.This will bring you to the System window where you can view information about your computer and access advanced settings.Step 2: Go to Advanced System SettingsClick on "Advanced system settings" on the left side of the System window.You’ll be directed to the System Properties window. This is where you can make changes to improve system performance.Step 3: Access Performance SettingsIn the System Properties window, click on the "Settings" button under the Performance section.This opens the Performance Options window, allowing you to tweak various settings related to your computer’s speed and memory usage.Step 4: Open Virtual Memory SettingsGo to the "Advanced" tab and click on the "Change" button under the Virtual memory section.You’ll now be in the Virtual Memory window where you can modify the paging file size.Step 5: Adjust the Paging File SizeUncheck the box that says "Automatically manage paging file size for all drives." Select the drive you want to modify and choose "Custom size." Enter the initial. Open Advanced System Settings. Advanced System Settings can be found in Control Panel, or by searching Advanced System Settings In the System Properties dialog box, select the Advanced tab; In the Advanced tabComments
8 Using Advanced Settings System Settings Clicking System Settings in the Advanced screen generates the “System Settings” screen, where various system and management parameters can be configured. System Use the “System” section of this screen to configure the following two option Wireless Broadband Router’s Hostname Specify the Router’s host name by entering it into the this text box. Page 117 Actiontec Wireless Broadband Router User Manual Local Domain Specify the network’s local domain by entering it into this text box. Actiontec MegaControl Panel Use this section to configure the following: Automatic Refresh of System Monitoring Web Pages Click in this check box to activate the automatic refresh of system monitoring web pages. Page 118 Chapter 8 Using Advanced Settings System Logging Use this section to configure the following system log options. Enable Logging Click in this check box to activate system logging. Low Capacity Notification Enabled Click in this check box to activate low capacity notification (works in tandem with “Allowed Capacity Before Email Notification”... Page 119 Actiontec Wireless Broadband Router User Manual Allowed Capacity Before Email Notification Enter the percentage of security log buffer capacity reached to trigger an E-mail notification. Security Log Buffer Size Enter the size of the security log buffer in this text box. Page 120 Chapter 8 Using Advanced Settings Auto WAN Detection When activated, Auto Detection causes the Router to automatically search for connection. Enable Logging Clicking in this check box activates automatic detection. PPP Timeout Enter the amount of time (in seconds) before the Router stops attempting to establish a broadband connection. Page 121: Universal Plug And Play (Upnp) Actiontec Wireless Broadband Router User Manual Universal Plug and Play (UPnP) To access the settings perform the following: 1. Click Universal Plug and Play in the Advanced screen. The “Universal Plug and Play” settings screen appears. 2. Click in the “Allow Other Network Users to Control Wireless Broadband Router’s Network Features”... Page 122: Firmware Upgrade Chapter 8 Using Advanced Settings Firmware Upgrade The Router offers a built-in mechanism for upgrading its firmware without losing custom configurations and settings. There are two methods for upgrading the firm- ware: • Upgrading from a local computer - use a software image file pre-down- loaded to the computer’s disk drive or located on the accompanying evalua- tion •... Page 123 Actiontec Wireless Broadband Router User Manual 2. In the “Upgrade From a Computer in the Network” section, click Upgrade Now. The “Upgrade From a Computer in the Network” screen appears. 3. Enter the path of the software image file, or press the “Browse” button to browse for the file, and click OK. Page 124 Chapter 8 Using Advanced Settings Automatically Check and Send E-mail If “Automatically Check for New Version and Notify via Email” is selected, enter the period of time the Router checks for a new upgrade, and the at which to get the upgrade, in the appropriate text boxes. The Router will then check at each time interval for firmware upgrades and, if one is available,
2025-03-31Or Q-Flash screen. Advanced Mode Function Keys Move the selection bar to select a setup menu ... Page 25: Favorites (F11) Favorites (F11) Set your frequently used options as your favorites and use the key to quickly switch to the page where all of your favorite options are located. To add or remove a favorite option, go to its original page and press ... Page 26: Tweaker Tweaker Whether the system will work stably with the overclock/overvoltage settings you made is dependent on your overall system configurations. Incorrectly doing overclock/overvoltage may result in damage to CPU, chipset, or memory and reduce the useful life of these components. This page is for advanced users only and we recommend you not to alter the default settings to prevent system instability or other unexpected results. Page 27 ƒ Advanced CPU Settings & Core Performance Boost (Note 1) Allows you to determine whether to enable the Core Performance Boost (CPB) technology, a CPU performance-boost technology. (Default: Auto) & SVM Mode Virtualization enhanced by Virtualization Technology will allow a platform to run multiple operating systems and applications in independent partitions. Page 28 ƒ Advanced Memory Settings ƒ Memory Subtimings d Standard Timing Control, Advanced Timing Control, CAD Bus Setup Timing, CAD Bus Drive Strength, Data Bus Configuration These sections provide memory timing settings. Note: Your system may become unstable or fail to boot after you make changes on the memory timings. Page 29: Settings Settings ƒ Platform Power & AC BACK Determines the state of
2025-03-25Refer to Vmware.com for additional information on setting up and using Paravirtualized RDMA (PVRDMA) network adapters.Prerequisites RDMA must be enabled in the device NVRAM via BIOS setup.Configuring a Virtual Center for PVRDMA Use the following steps to configure a Virtual Center for PVRDMA:Creating a distributed virtual switch (DVS) requires a DVS for PVRDMA.Tagging vmknic for PVRDMA on ESX Hosts To tag a vmknic for PVRDMA to use on ESX hosts:Select the host and right-click Settings to switch to the settings page of the Manage tabs.In the Settings page, expand System and click Advanced System Settings to show the advanced system settings key-pair value and its summary. Click Edit to bring up the Edit Advanced System Settings.Filter on PVRDMA to narrow all the settings to just Net.PVRDMAVmknic.Set the Net.PVRDMAVmknic value to vmknic.Setting the Firewall Rule for PVRDMA Use the following steps to set the firewall rule for PVRDMA:Select the host and right-click Settings to switch to the settings page of the Manage tabs.In the Settings page, expand System and click Security Profile to show the firewall summary.Click Edit to bring up the Edit Security Profile.Scroll down to find pvrdma and check the box to set the firewall.Adding a PVRDMA Device to the VM Use the following steps to add a PVRDMA device to the VM:Select the VM and right-click Edit Settings.Add a new Network Adapter.Select the network as a Distributed Virtual Switch and Port Group.For the Adapter Type, select PVRDMA and click OK.Configuring the VM on Linux Guest Operating System The
2025-04-19Safe mode is a software or operating system mode where most fixes are done. It is a diagnostic mode. Some malware require removal in this mode.For Windows operating systems, you may follow these steps depending on the operating system installed on your computer:• On Windows 7 and Windows Server 2008 (R2)Restart your computer.Press F8 after the Power-On Self Test (POST) routine is done. If the Advanced Boot Options menu does not appear, try restarting and then pressing F8 several times after the POST screen is displayed.On the Advanced Boot Options menu, use the arrow keys to select the Safe Mode option, and then press Enter.• On Windows 8, Windows 8.1 and Windows Server 2012 (R2)Access the Charms bar by moving your mouse pointer to the upper-right corner of the screen.Move your mouse pointer down and click Settings>Change your PC Settings.In the left panel, click General.In the right panel, scroll down to the bottom to find the Advanced startup section, then click the Restart now button and wait for the system to restart.In the Advanced Startup menu, click Troubleshoot>Advanced Options>Startup Settings>Restart and wait for the system to restart.In the Startup Settings menu, press 4 to enable safe mode.• On Windows 10Press Windows logo key + I on your keyboard to open Settings. If that doesn't work, select the Start button, then select Settings.Select Update & Security > Recovery.Under Advanced startup, select Restart now.After your PC restarts to the Choose an option screen, select Troubleshoot > Advcanced options > Startup settings > Restart.After your PC restarts, you'll see a list og options. Select 4 or press F4 to start your PC in Safe Mode.
2025-04-06