Avast turning off windows update
Author: o | 2025-04-24

Every time Windows 10 updates now, it automatically turns OFF my Avast antivirus and turns ON Windows Defender or the native Windows antivirus. It doesn't ask, it just turns Avast OFF. Avast will run normally but when I go to the Antivirus Security Providers, Avast if OFF and Windows Defender is ON. Quit doing this every time I update. Every time Windows 10 updates now, it automatically turns OFF my Avast antivirus and turns ON Windows Defender or the native Windows antivirus. It doesn't ask, it just turns Avast OFF. Avast will run normally but when I go to the Antivirus Security Providers, Avast if OFF and Windows Defender is ON. Quit doing this every time I update. This is

Avast and Windows Update turning off?
8 64-bit | Windows 8.1 Disconnect your PC from the network by removing the network cable or turning off Wi-Fi, then restart your PC. It is essential that you disconnect from the network first, and then restart your PC. Otherwise, the DoublePulsar back door may not be properly removed. After your PC restarts, run the installer that you saved to your desktop in step 1. Restart your PC again to complete the installation process. Reconnect to the network. After installing the update, run a Network Inspector scan in Avast Antivirus to confirm that your PC is no longer vulnerable.If the troubleshooting steps above do not work, try the other solutions below.Other solutions Update Windows manually via Windows Update: Restart your PC. Press the Win key on your keyboard, then hover the cursor over the the - minus sign in the bottom-right corner of the screen to open the Windows menu options. Go to Settings ▸ Change PC settings ▸ Windows Update ▸ Check for updates now. After installing any available updates, run a Network Inspector scan in Avast Antivirus to confirm that your PC is no longer vulnerable. If you are unable to install the update, the only other way to fix this vulnerability is to disable the Windows file-sharing service, specifically version 1 of the SMB protocol. Refer to the following Microsoft guide to learn how to disable SMBv1: Microsoft Docs ▸ How to enable and disable SMBv1, SMBv2, and SMBv3 in Windows Follow the steps below on the vulnerable PC that is running Windows 7:Go to the link below to open the Microsoft Update Catalog and download the security update, then save it to your desktop: Microsoft Update Catalog ▸ Update for Windows 7 Disconnect your PC from the network by removing the network cable or turning off Wi-Fi, then restart your PC. It is essential that you disconnect from the network first, and then restart your PC. Otherwise, the DoublePulsar back door may not be properly removed. After your PC restarts, run the installer you saved to your desktop in step 1. Restart your PC again to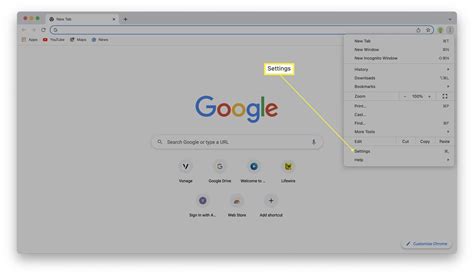
Windows Update August 15 - turn Avast off?
Complete the installation process. Reconnect to the network. After installing the update, run a Network Inspector scan in Avast Antivirus to confirm that your PC is no longer vulnerable.If the troubleshooting steps above do not work, try the other solutions below. Other solutionsUpdate Windows manually via Windows Update: Restart your PC. Click the Windows Start button and select Control Panel. Go to System & Security ▸ Windows Update ▸ Check for updates. After installing any available updates, run a Network Inspector scan in Avast Antivirus to confirm that your PC is no longer vulnerable. If you are unable to install the update, the only other way to fix this vulnerability is to disable the Windows file-sharing service, specifically version 1 of the SMB protocol. Refer to the following Microsoft guide to learn how to disable SMBv1: Microsoft Docs ▸ How to enable and disable SMBv1, SMBv2, and SMBv3 in Windows Follow the steps below on the vulnerable PC that is running Windows Vista: Go to the link below to open the Microsoft Update Catalog and download the security update, then save it to your desktop: Microsoft Update Catalog ▸ Update for Windows Vista Disconnect your PC from the network by removing the network cable or turning off Wi-Fi, then restart your PC. It is essential that you disconnect from the network first, and then restart your PC. Otherwise, the DoublePulsar back door may not be properly removed. After your PC restarts, run the installer you saved to your desktop in step 1. Restart your PC again to complete the installation process. Reconnect to the network. After installing the update, run a Network Inspector scan in Avast Antivirus to confirm that your PC is no longer vulnerable.If the troubleshooting steps above do not work, try the other solutions below. Other solutionsUpdate Windows manually via Windows Update: Restart your PC. Click the Windows Start button and select Control Panel. Go to Security ▸ System & Security ▸ Windows Update ▸ Check for updates. After installing any available updates, run a Network Inspector scan in Avast Antivirus to confirm that your PC isDisabling avast and turning off Windows Firewall to update
Self-Defense is a feature in Avast antivirus software that helps to protect software from being disabled or removed by other malware. This post will show you how to enable / disable the Self-defense feature in Avast Antivirus. Self-Defense is a feature in Avast antivirus software that helps to protect software from being disabled or removed by other malware. Avast process after turning on the Self-Defense feature using a built-in security mechanism from Windows 8.1 Protected Process Light (PPL) to protect. And other processes that are not PPL protected will not be able to kill the process of the process, nor will they be able to edit its settings. This post will show you how to enable / disable the Self-defense feature in Avast Antivirus. How to enable Self-defense feature in Avast Step 1: Open the Avast software interface How to turn on / off Self-Defense in Avast Antivirus Picture 1 Step 2: Go to Menu, then go to Setup Troubleshooting How to turn on / off Self-Defense in Avast Antivirus Picture 2 Step 3: You will see the Enable Self-defense option. Just click on that checkbox. How to turn on / off Self-Defense in Avast Antivirus Picture 3 How to turn off Self-defense mode Do the same, open Avast, go to Menu -> Troubleshooting. Disregard Enable Self-defense. You will see the following warning dialog: How to turn on / off Self-Defense in Avast Antivirus Picture 4 You choose Yes, and if you are using it, it will appear automatically, because. Every time Windows 10 updates now, it automatically turns OFF my Avast antivirus and turns ON Windows Defender or the native Windows antivirus. It doesn't ask, it just turns Avast OFF. Avast will run normally but when I go to the Antivirus Security Providers, Avast if OFF and Windows Defender is ON. Quit doing this every time I update. Every time Windows 10 updates now, it automatically turns OFF my Avast antivirus and turns ON Windows Defender or the native Windows antivirus. It doesn't ask, it just turns Avast OFF. Avast will run normally but when I go to the Antivirus Security Providers, Avast if OFF and Windows Defender is ON. Quit doing this every time I update. This isUpdate to latest Avast () turned off Windows Defender
The required resources from Windows.Press Ctrl + Shift + ESC keys to open Task ManagerNow check which program is using more Resources, usually indicated by a darker backgroundRight-click on that program and select End taskNow check if the hanging is solved or not.Solution 5: Try Enabling/Disabling VPN while playing Deep Rock GalacticStill running into frozen Loading Screen error on Windows 11/10/7? If you’ve got a VPN on, try turning it off to see if it makes a difference. If it’s off, switch it on and check again. But heads up! Don’t jump between too many regions; you don’t want to get blocked. Remember, the right VPN can be a game-changer.Solution 6: Add Game Exceptions on Antivirus PCSometimes antivirus thinks game files are bad guys and stops them, causing the hanging.To fix this, tell your antivirus that Deep Rock Galactic files are cool by adding them to the “exceptions” list. This way, you can play without the antivirus messing things up!Follow the steps below to add an exception on Antivirus (This guide is for Avast, and would be similar for other antiviruses):Launch Avast on your PC.Select Menu at the top-right corner of Avast.Choose Settings from the menu.From the left sidebar, choose General > ExceptionsClick ADD EXCEPTION and then type the URL you want to add to it.Click ADD EXCEPTION to save the URL and check if you can access the URLIf you are still facing Avast Blocking Websites, continue to the next solution.Solution 7: Check if Windows or Any Driver is OutdatedSometimes compatibility issues can be a reason for continuous Deep Rock Galactic freezing on Windows. Often, it’s all about the updates. First off, head to your Windows settings and see if there’s an update waiting. While you’re on this updating spree, dive into your device manager and update your Wi-FiTurning off Avast! while updating windows - Avast Free Antivirus
To maximum performance, try running the game on lower settings to consume fewer resources. This can include:A lower resolution(From 4k to 1080p or 1080p to 720p)A lower frame rate (try playing at 60Hz)If there are too many programs running in the background, using too much internet/RAM/Disk can cause 3on3 Freestyle shutdown on Windows 11.Closing unwanted programs will help you eliminate the black screen on startup issue on your PC as your game would be able to get the required resources from Windows 11/10.Press Ctrl + Shift + ESC keys to open Task ManagerNow check which program is using more Resources, usually indicated by a darker backgroundRight-click on that program and select End taskNow check if the not loading is solved or not.Solution 5: Try Enabling/Disabling VPN while playing 3on3 FreestyleStill running into not loading error on Windows 11? If you’ve got a VPN on, try turning it off to see if it makes a difference. If it’s off, switch it on and check again. But heads up! Don’t jump between too many regions; you don’t want to get blocked. Remember, the right VPN can be a game-changer.Solution 6: Add Game Exceptions on Antivirus PCSometimes antivirus thinks game files are bad guys and stops them, causing the black screen on startup.To fix this, tell your antivirus that 3on3 Freestyle files are cool by adding them to the “exceptions” list. This way, you can play without the antivirus messing things up!Follow the steps below to add an exception on Antivirus (This guide is for Avast, and would be similar for other antiviruses):Launch Avast on your PC.Select Menu at the top-right corner of Avast.Choose Settings from the menu.From the left sidebar, choose General > ExceptionsClick ADD EXCEPTION and then type the URL you want to add to it.Click ADD EXCEPTION to save the URL and check if you can access the URLIf you are still facing Avast Blocking Websites, continue to the next solution.Solution 7: Check if Windows or Any Driver is OutdatedSometimes compatibility issues can be a reason for continuous 3on3 Freestyle not loading on Windows 11. Often, it’s all about the updates. First off, head to your Windows settings and see if there’s an update waiting. While you’re on this updating spree, dive into your device manager and update your Wi-Fi drivers and update graphics drivers making sure they are on the latest versions. These updates can make a big difference,Windows Update August 15 - turn Avast off? - Avast WEBforum
Not opening issue on your PC as your game would be able to get the required resources from Windows 11/10/7.Press Ctrl + Shift + ESC keys to open Task ManagerNow check which program is using more Resources, usually indicated by a darker backgroundRight-click on that program and select End taskNow check if the black screen on startup is solved or not.Solution 5: Try Enabling/Disabling VPN while playing iRacingStill running into black screen error on Windows 11/10/7? If you’ve got a VPN on, try turning it off to see if it makes a difference. If it’s off, switch it on and check again. But heads up! Don’t jump between too many regions; you don’t want to get blocked. Remember, the right VPN can be a game-changer.Solution 6: Add Game Exceptions on Antivirus PCSometimes antivirus thinks game files are bad guys and stops them, causing the not opening.To fix this, tell your antivirus that iRacing files are cool by adding them to the “exceptions” list. This way, you can play without the antivirus messing things up!Follow the steps below to add an exception on Antivirus (This guide is for Avast, and would be similar for other antiviruses):Launch Avast on your PC.Select Menu at the top-right corner of Avast.Choose Settings from the menu.From the left sidebar, choose General > ExceptionsClick ADD EXCEPTION and then type the URL you want to add to it.Click ADD EXCEPTION to save the URL and check if you can access the URLIf you are still facing Avast Blocking Websites, continue to the next solution.Solution 7: Check if Windows or Any Driver is OutdatedSometimes compatibility issues can be a reason for continuous iRacing not opening on Windows 11. Often, it’s all about the updates. First off, head to your Windows settings and see if there’s an update waiting. While you’re on this updating spree, dive into your device manager and update your Wi-Fi drivers and update graphics drivers making sure they are on the latest versions. These updates can make a big difference, fixing a lot of errors.Solution 8: Contact iRacing SupportTried everything and that game error’s still bugging you? As a last resort, head to the iRacing’s official website and click ‘Support’ or ‘Contact’. Send them an email, jump into live chat, or post in their official forums.Share what’s happening and any error messages. Remember to double-check you’re on the official site. Sometimes, reaching out is the best way to get back to gaming!Stay smart and game on!Final thoughtsIn conclusion, encountering crashes, black screens, or startup problems while playing iRacing can be irritating, but there are various solutions available to resolve these issues. By restarting your PC, running the program as an administrator, updating the game, closing intensive. Every time Windows 10 updates now, it automatically turns OFF my Avast antivirus and turns ON Windows Defender or the native Windows antivirus. It doesn't ask, it just turns Avast OFF. Avast will run normally but when I go to the Antivirus Security Providers, Avast if OFF and Windows Defender is ON. Quit doing this every time I update. Every time Windows 10 updates now, it automatically turns OFF my Avast antivirus and turns ON Windows Defender or the native Windows antivirus. It doesn't ask, it just turns Avast OFF. Avast will run normally but when I go to the Antivirus Security Providers, Avast if OFF and Windows Defender is ON. Quit doing this every time I update. This isComments
8 64-bit | Windows 8.1 Disconnect your PC from the network by removing the network cable or turning off Wi-Fi, then restart your PC. It is essential that you disconnect from the network first, and then restart your PC. Otherwise, the DoublePulsar back door may not be properly removed. After your PC restarts, run the installer that you saved to your desktop in step 1. Restart your PC again to complete the installation process. Reconnect to the network. After installing the update, run a Network Inspector scan in Avast Antivirus to confirm that your PC is no longer vulnerable.If the troubleshooting steps above do not work, try the other solutions below.Other solutions Update Windows manually via Windows Update: Restart your PC. Press the Win key on your keyboard, then hover the cursor over the the - minus sign in the bottom-right corner of the screen to open the Windows menu options. Go to Settings ▸ Change PC settings ▸ Windows Update ▸ Check for updates now. After installing any available updates, run a Network Inspector scan in Avast Antivirus to confirm that your PC is no longer vulnerable. If you are unable to install the update, the only other way to fix this vulnerability is to disable the Windows file-sharing service, specifically version 1 of the SMB protocol. Refer to the following Microsoft guide to learn how to disable SMBv1: Microsoft Docs ▸ How to enable and disable SMBv1, SMBv2, and SMBv3 in Windows Follow the steps below on the vulnerable PC that is running Windows 7:Go to the link below to open the Microsoft Update Catalog and download the security update, then save it to your desktop: Microsoft Update Catalog ▸ Update for Windows 7 Disconnect your PC from the network by removing the network cable or turning off Wi-Fi, then restart your PC. It is essential that you disconnect from the network first, and then restart your PC. Otherwise, the DoublePulsar back door may not be properly removed. After your PC restarts, run the installer you saved to your desktop in step 1. Restart your PC again to
2025-04-12Complete the installation process. Reconnect to the network. After installing the update, run a Network Inspector scan in Avast Antivirus to confirm that your PC is no longer vulnerable.If the troubleshooting steps above do not work, try the other solutions below. Other solutionsUpdate Windows manually via Windows Update: Restart your PC. Click the Windows Start button and select Control Panel. Go to System & Security ▸ Windows Update ▸ Check for updates. After installing any available updates, run a Network Inspector scan in Avast Antivirus to confirm that your PC is no longer vulnerable. If you are unable to install the update, the only other way to fix this vulnerability is to disable the Windows file-sharing service, specifically version 1 of the SMB protocol. Refer to the following Microsoft guide to learn how to disable SMBv1: Microsoft Docs ▸ How to enable and disable SMBv1, SMBv2, and SMBv3 in Windows Follow the steps below on the vulnerable PC that is running Windows Vista: Go to the link below to open the Microsoft Update Catalog and download the security update, then save it to your desktop: Microsoft Update Catalog ▸ Update for Windows Vista Disconnect your PC from the network by removing the network cable or turning off Wi-Fi, then restart your PC. It is essential that you disconnect from the network first, and then restart your PC. Otherwise, the DoublePulsar back door may not be properly removed. After your PC restarts, run the installer you saved to your desktop in step 1. Restart your PC again to complete the installation process. Reconnect to the network. After installing the update, run a Network Inspector scan in Avast Antivirus to confirm that your PC is no longer vulnerable.If the troubleshooting steps above do not work, try the other solutions below. Other solutionsUpdate Windows manually via Windows Update: Restart your PC. Click the Windows Start button and select Control Panel. Go to Security ▸ System & Security ▸ Windows Update ▸ Check for updates. After installing any available updates, run a Network Inspector scan in Avast Antivirus to confirm that your PC is
2025-04-16The required resources from Windows.Press Ctrl + Shift + ESC keys to open Task ManagerNow check which program is using more Resources, usually indicated by a darker backgroundRight-click on that program and select End taskNow check if the hanging is solved or not.Solution 5: Try Enabling/Disabling VPN while playing Deep Rock GalacticStill running into frozen Loading Screen error on Windows 11/10/7? If you’ve got a VPN on, try turning it off to see if it makes a difference. If it’s off, switch it on and check again. But heads up! Don’t jump between too many regions; you don’t want to get blocked. Remember, the right VPN can be a game-changer.Solution 6: Add Game Exceptions on Antivirus PCSometimes antivirus thinks game files are bad guys and stops them, causing the hanging.To fix this, tell your antivirus that Deep Rock Galactic files are cool by adding them to the “exceptions” list. This way, you can play without the antivirus messing things up!Follow the steps below to add an exception on Antivirus (This guide is for Avast, and would be similar for other antiviruses):Launch Avast on your PC.Select Menu at the top-right corner of Avast.Choose Settings from the menu.From the left sidebar, choose General > ExceptionsClick ADD EXCEPTION and then type the URL you want to add to it.Click ADD EXCEPTION to save the URL and check if you can access the URLIf you are still facing Avast Blocking Websites, continue to the next solution.Solution 7: Check if Windows or Any Driver is OutdatedSometimes compatibility issues can be a reason for continuous Deep Rock Galactic freezing on Windows. Often, it’s all about the updates. First off, head to your Windows settings and see if there’s an update waiting. While you’re on this updating spree, dive into your device manager and update your Wi-Fi
2025-04-17