Css transform
Author: i | 2025-04-24
CSS transform property compatiblity. 3. CSS: Customizing Transforms. 0. CSS transform property is not working properly. 6. CSS transformation without transforming its content. 0. Modifying values in a transform style. 17. Trying to apply CSS transform in
Multiple transforms css - CSS Transforms
Tailwind CSS Skew is a utility that is used to apply transformation by Specifying an element's origin.Tailwind CSS Transform Origin ClassesThe following is the list of Tailwind CSS Transform Origin Classes that are used to apply transform origin. Class CSS Properties origin-center transform-origin: center; origin-top transform-origin: top; origin-top-right transform-origin: top right; origin-right transform-origin: right; origin-bottom-right transform-origin: bottom right; origin-bottom transform-origin: bottom; origin-bottom-left transform-origin: bottom left; origin-left transform-origin: left; origin-top-left transform-origin: top left; Functionality of Tailwind CSS Transform Origin Classes origin-center: This class is used to set the transform origin of an element at the center. origin-top: This class is used to set the transform origin of an element at the top. origin-top-right: This class is used to set the transform origin of an element at the top-right. origin-right: This class is used to set the transform origin of an element at the right. origin-bottom-right: This class is used to set the transform origin of an element at the bottom-right. origin-bottom: This class is used to set the transform origin of an element at the bottom. origin-bottom-left: This class is used to set the transform origin of an element at the bottom-left. origin-left: This class is used to set the transform origin of an element at the left. origin-top-left: This class is used to set the transform origin of an element at the top-left.Tailwind CSS Transform Origin ExampleThe following example will illustrate the different transformation of an element based on the specified origin.Example Tailwind CSS Origin Classes origin-center origin-top origin-top-right Example Tailwind CSS Origin Classes origin-right origin-bottom-right origin-bottom Example Tailwind CSS Origin Classes origin-bottom-left origin-left origin-top-left![]()
CSS Transforms: Using CSS Transforms - W3cubDocs
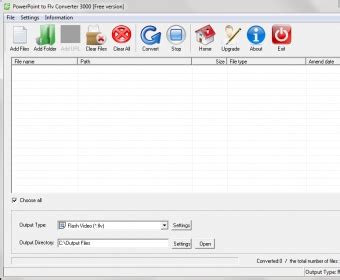
What's Autoprefixer? Some CSS rules need weird "vendor prefixes" to work in certain browsers. Autoprefixer adds these prefixes to CSS rules automatically. Dynamic Detection Autoprefixer uses the Can I Use database to determine when a rule needs a prefix, based on the browsers you tell it to support. This means you get prefixes only when you need them, so when you write: :fullscreen a { transition: transform 1s; } Autoprefixer transforms that rule into cross-browser CSS::-webkit-full-screen a { -webkit-transition: -webkit-transform 1s; transition: transform 1s }:-moz-full-screen a { transition: transform 1s }:-ms-fullscreen a { transition: transform 1s }:fullscreen a { -webkit-transition: -webkit-transform 1s; transition: transform 1s } Enabling Autoprefixer First, make sure you've read Setting Language Options. Autoprefixer is available for Sass, Less, Stylus, and regular CSS files. Select one of those files and check the Run Autoprefixer box in the inspector pane. You can also turn on Autoprefixer for all files at once. Open Project Settings, choose one of the languages above, then check the Run Autoprefixer box. Autoprefixer Options Open Project Settings, then choose the Autoprefixer category: Browser String This tells Autoprefixer the browsers for which it should write prefixes. You can customize this setting in the Target Browsers category. (It's shared by several tools in CodeKit.) Internet Explorer Grid Support Grid statements require Microsoft-specific prefixes to work in certain versions of Internet Explorer. If you need to support those browsers, enable this option.CSS Transform Handbook – Complete Guide to CSS Transform
Color = ref('blue')script>template> ContextMenuRoot> ContextMenuTrigger>…ContextMenuTrigger> ContextMenuPortal> ContextMenuContent> ContextMenuRadioGroup v-model="color"> ContextMenuRadioItem value="red"> ContextMenuItemIndicator> Icon icon="radix-icons:check" /> ContextMenuItemIndicator> Red ContextMenuRadioItem> ContextMenuRadioItem value="blue"> ContextMenuItemIndicator> Icon icon="radix-icons:check" /> ContextMenuItemIndicator> Blue ContextMenuRadioItem> ContextMenuRadioItem value="green"> ContextMenuItemIndicator> Icon icon="radix-icons:check" /> ContextMenuItemIndicator> Green ContextMenuRadioItem> ContextMenuRadioGroup> ContextMenuContent> ContextMenuPortal> ContextMenuRoot>template>With complex items You can add extra decorative elements in the Item parts, such as images.vuescript setup lang="ts">import { ContextMenuContent, ContextMenuItem, ContextMenuPortal, ContextMenuRoot, ContextMenuTrigger } from 'radix-vue'script>template> ContextMenuRoot> ContextMenuTrigger>…ContextMenuTrigger> ContextMenuPortal> ContextMenuContent> ContextMenuItem> img src="…"> Adolfo Hess ContextMenuItem> ContextMenuItem> img src="…"> Miyah Myles ContextMenuItem> ContextMenuContent> ContextMenuPortal> ContextMenuRoot>template>Constrain the content/sub-content size You may want to constrain the width of the content (or sub-content) so that it matches the trigger (or sub-trigger) width. You may also want to constrain its height to not exceed the viewport.We expose several CSS custom properties such as --radix-context-menu-trigger-width and --radix-context-menu-content-available-height to support this. Use them to constrain the content dimensions.vuescript setup lang="ts">import { ContextMenuContent, ContextMenuItem, ContextMenuPortal, ContextMenuRoot, ContextMenuTrigger } from 'radix-vue'script>template> ContextMenuRoot> ContextMenuTrigger>…ContextMenuTrigger> ContextMenuPortal> ContextMenuContent class="ContextMenuContent"> … ContextMenuContent> ContextMenuPortal> ContextMenuRoot>template>css/* styles.css */.ContextMenuContent { width: var(--radix-context-menu-trigger-width); max-height: var(--radix-context-menu-content-available-height);}Origin-aware animations We expose a CSS custom property --radix-context-menu-content-transform-origin. Use it to animate the content from its computed origin based on side, sideOffset, align, alignOffset and any collisions.vuescript setup lang="ts">import { ContextMenuContent, ContextMenuPortal, ContextMenuRoot, ContextMenuTrigger } from 'radix-vue'script>template> ContextMenuRoot> ContextMenuTrigger>…ContextMenuTrigger> ContextMenuPortal> ContextMenuContent class="ContextMenuContent"> … ContextMenuContent> ContextMenuPortal> ContextMenuRoot>template>css/* styles.css */.ContextMenuContent { transform-origin: var(--radix-context-menu-content-transform-origin); animation: scaleIn 0.5s ease-out;}@keyframes scaleIn { from { opacity: 0; transform: scale(0); } to { opacity: 1; transform: scale(1); }}Collision-aware animations We expose data-side and data-align attributes. Their values will change at runtime to reflect collisions. Use them to create collision and direction-aware animations.vuescript setup lang="ts">import { ContextMenuContent, ContextMenuPortal, ContextMenuRoot, ContextMenuTrigger } from 'radix-vue'script>template> ContextMenuRoot> ContextMenuTrigger>…ContextMenuTrigger> ContextMenuPortal> ContextMenuContent class="ContextMenuContent"> … ContextMenuContent> ContextMenuPortal> ContextMenuRoot>template>css/* styles.css */.ContextMenuContent { animation-duration: 0.6s; animation-timing-function: cubic-bezier(0.16, 1, 0.3, 1);}.ContextMenuContent[data-side="top"] { animation-name: slideUp;}.ContextMenuContent[data-side="bottom"] { animation-name: slideDown;}@keyframes slideUp { from { opacity: 0; transform: translateY(10px); } to { opacity: 1; transform: translateY(0); }}@keyframes slideDown { from { opacity: 0; transform: translateY(-10px); } to { opacity: 1; transform: translateY(0); }}Accessibility Uses roving tabindex to manage focus movement among menu items.Keyboard Interactions KeyDescriptionSpaceActivates the focused item.EnterActivates the focused item.ArrowDownMoves focus to the next item.ArrowUpMoves focus to the previous item.ArrowRightArrowLeft When focus is on ContextMenu.SubTrigger, opens or closes the submenu depending on reading direction. EscCloses the context menu. CSS transform property compatiblity. 3. CSS: Customizing Transforms. 0. CSS transform property is not working properly. 6. CSS transformation without transforming its content. 0. Modifying values in a transform style. 17. Trying to apply CSS transform inCSS Style transform Property: CSS Transform - CodeLucky
The CSS -webkit-transform property enables web authors to transform an element in two-dimensional (2D) or three-dimensional (3D) space. For example, you can rotate elements, scale them, skew them, and more. Demo The -webkit-transform property accepts a list of "transform functions" as values. These transform functions have names such as scale(), rotate(), skew(), etc, which accept parameters to determine the level of transformation (for example, the angle to rotate an element).The CSS -webkit-transform property is a proprietary CSS extension that is supported by the WebKit browser engine. WebKit extensions contain the -webkit- prefix, which indicates that it belongs to the WebKit open source framework.Although the -webkit-transform property is not part of the official W3C CSS specification, it is designed to work on browsers that are powered by the WebKit browser engine, such as Apple Safari and Google Chrome. SyntaxThe syntax for the -webkit-transform property is: Where represents one of the transform functions listed below under Accepted Values.Example CodeHere's an example of usage (note that this example also includes other proprietary extensions): Accepted ValuesHere are the accepted values for the -webkit-transform property: none Specifies that no transforms should be applied to the element. This is the default value. transform function One or more of the transform functions below.Transform FunctionsHere is a list of transform functions that you can use with the -webkit-transform property. Transform Function Description matrix() Specifies a 2D transformation in the form of a transformation matrix of six values. Syntax: -webkit-transform: matrix(m11, m12, m21, m22, tX, tY) The parameters m11, m12, m21, m22 represent the elements of a 2x2 matrix in column-major order: 1,12,1 1,22,2 The parameters tX, tY represent the x and y translation elements. Example: -webkit-transform: matrix(1, 0, 0.6, 1, 250, 0); The matrix() transform function is available on the following: Safari 3.1 and later. iOS 2.0 and later. Google Chrome 1.0 and later. matrix3d() Specifies a 3D transformation as a 4 x 4 matrix. Syntax: -webkit-transform: matrix3d(m00, m01, m02, m03, m10, m11, m12, m13, m20, m21, m22, m23, m30, m31, m31, m33) The parameters represent a 4x4 homogeneous matrix of 16 values in column-major order: 0,01,02,03,0 0,11,12,13,1 0,21,22,23,2 0,31,32,33,3 The matrix3d() transform function is available on the following: Safari 4.0.3 and later running on Mac OS X version 10.6 and later. iOS 2.0 and later. Google Chrome 12.0 and later. perspective() Specifies a perspective projection matrix. Syntax: -webkit-transform: perspective(depth) Where depth equals the distance, in pixels, ofCSS Transform Handbook Complete Guide to CSS Transform
Beginners Guide to CSS Animations--> CSS animations are a powerful way to add interactivity and visual interest to your websites. With CSS animations, you can create effects such as fading elements in and out, moving elements around the page, changing the appearance of elements over time, and even simulate complex physics-based effects.To create a CSS animation, you need to do two things:Define the animation keyframes. Keyframes are the different stages of the animation. For each keyframe, you specify the CSS properties that you want to animate and the values of those properties.Apply the animation to an HTML element. Once you have defined your animation keyframes, you can apply the animation to an HTML element using the animation property.Defining animation keyframesAnimation keyframes are defined using the @keyframes at-rule. The @keyframes at-rule takes the name of your animation as its argument. Inside the @keyframes at-rule, you define one or more keyframes.Each keyframe is defined by a percentage value and a set of CSS properties. The percentage value specifies when the keyframe should occur in the animation. The CSS properties specify the values that the element should have at that point in the animation.For example, the following code defines a simple animation that bounces an element up and down:CSS@keyframes bounce { 0% { transform: translateY(0); } 50% { transform: translateY(-10px); } 100% { transform: translateY(0); }}This animation has three keyframes:The first keyframe occurs at 0% of the animation. At this point, the element's transform: translateY() property is set to 0, which keeps the element in its original position.The second keyframe occurs at 50% of the animation. At this point, the element's transform: translateY() property is set to -10px, which moves the element 10 pixels down.The third keyframe occurs at 100% of the animation. At this point, the element's transform: translateY() property is set back to 0, which moves the element back to its original position.Applying animations to HTML elementsOnce you have defined your animation keyframes, you can apply the animation to an HTML element using the animation property. The animation property takes the name of your animation as its value.For example, the following code applies the bounce animation to the .box element:CSS.box:hover { animation: bounce 1s linear;}This code tells the browser to animate the .box element using the bounce animation over a period of 1 second. The linear timing function specifies that the animation should play at a constant speed. You can see the result of this animation below.Animation ResultHover over me to view animation.Animation propertiesIn addition to the animation property, there are a number of other CSS properties that you can use to control your animations. These properties include:animation-duration: Specifies the duration of the animation in seconds.animation-timing-function: Specifies the speed curve ofCSS transform-style Property - CSS 3D Transforms
Dive into a world of cards that feel like they could jump off the screen.Fly Over Places with Akhil Sai RamSee the Pen World Places (CSS 3d hover) by Akhil Sai Ram (@akhil_001) on CodePen.Kudos to Akhil for creating this 3D magic. Just hover over and feel like you’re traveling around the globe.See it in 3D with Jérémy HeleineSee the Pen 3D Perspective View by SitePoint (@SitePoint) on CodePen.Got a thing for prisms? Jérémy brings you a rotating prism that reacts to your mouse. Click, drag, and be amazed! Plus, some serious lessons on HTML, CSS perspective views, and transforming the 3D world.FAQ On CSS PerspectiveWhat exactly is CSS perspective?CSS perspective unlocks dimensions; think of it as a magic wand, granting web elements the illusion of depth. It crafts the scene where elements play on a pseudo-3D stage, influenced by a virtual camera angle—forging realms where pixels meet perspective.How does CSS perspective differ from transform?Perspective lays the 3D groundwork, affecting the scale of depth. Transform, however, is the orchestra, directing how elements rotate, scale, and move in that space.Together, they compose the symphony of depth and motion, each with its distinct part in the choreography of visuals.Can you animate the CSS perspective property?Absolutely, animating perspective breathes life into static elements. Invoke the spirit of CSS animation, blending transitions and perspective shifts, crafting a dance of elements that approach or recede as if the screen were a stage and pixels the performers.What’s perspective-origin in CSS?Picture perspective-origin as the director’s camera, stationed at just the right spot. This CSS property tells the scene where to pivot, setting the vanishing point’s anchor—a crucial cue in the realm of visual effects where the director’s gaze steers the viewer’s focus.Is it necessary to use CSS perspective on all 3D elements?Not always. Perspective is a tool. CSS transform property compatiblity. 3. CSS: Customizing Transforms. 0. CSS transform property is not working properly. 6. CSS transformation without transforming its content. 0. Modifying values in a transform style. 17. Trying to apply CSS transform in CSS transform property compatiblity. 3. CSS: Customizing Transforms. 0. CSS transform property is not working properly. 6. CSS transformation without transforming its content. 0. Modifying values in a transform style. 17. Trying to apply CSS transform inComments
Tailwind CSS Skew is a utility that is used to apply transformation by Specifying an element's origin.Tailwind CSS Transform Origin ClassesThe following is the list of Tailwind CSS Transform Origin Classes that are used to apply transform origin. Class CSS Properties origin-center transform-origin: center; origin-top transform-origin: top; origin-top-right transform-origin: top right; origin-right transform-origin: right; origin-bottom-right transform-origin: bottom right; origin-bottom transform-origin: bottom; origin-bottom-left transform-origin: bottom left; origin-left transform-origin: left; origin-top-left transform-origin: top left; Functionality of Tailwind CSS Transform Origin Classes origin-center: This class is used to set the transform origin of an element at the center. origin-top: This class is used to set the transform origin of an element at the top. origin-top-right: This class is used to set the transform origin of an element at the top-right. origin-right: This class is used to set the transform origin of an element at the right. origin-bottom-right: This class is used to set the transform origin of an element at the bottom-right. origin-bottom: This class is used to set the transform origin of an element at the bottom. origin-bottom-left: This class is used to set the transform origin of an element at the bottom-left. origin-left: This class is used to set the transform origin of an element at the left. origin-top-left: This class is used to set the transform origin of an element at the top-left.Tailwind CSS Transform Origin ExampleThe following example will illustrate the different transformation of an element based on the specified origin.Example Tailwind CSS Origin Classes origin-center origin-top origin-top-right Example Tailwind CSS Origin Classes origin-right origin-bottom-right origin-bottom Example Tailwind CSS Origin Classes origin-bottom-left origin-left origin-top-left
2025-03-29What's Autoprefixer? Some CSS rules need weird "vendor prefixes" to work in certain browsers. Autoprefixer adds these prefixes to CSS rules automatically. Dynamic Detection Autoprefixer uses the Can I Use database to determine when a rule needs a prefix, based on the browsers you tell it to support. This means you get prefixes only when you need them, so when you write: :fullscreen a { transition: transform 1s; } Autoprefixer transforms that rule into cross-browser CSS::-webkit-full-screen a { -webkit-transition: -webkit-transform 1s; transition: transform 1s }:-moz-full-screen a { transition: transform 1s }:-ms-fullscreen a { transition: transform 1s }:fullscreen a { -webkit-transition: -webkit-transform 1s; transition: transform 1s } Enabling Autoprefixer First, make sure you've read Setting Language Options. Autoprefixer is available for Sass, Less, Stylus, and regular CSS files. Select one of those files and check the Run Autoprefixer box in the inspector pane. You can also turn on Autoprefixer for all files at once. Open Project Settings, choose one of the languages above, then check the Run Autoprefixer box. Autoprefixer Options Open Project Settings, then choose the Autoprefixer category: Browser String This tells Autoprefixer the browsers for which it should write prefixes. You can customize this setting in the Target Browsers category. (It's shared by several tools in CodeKit.) Internet Explorer Grid Support Grid statements require Microsoft-specific prefixes to work in certain versions of Internet Explorer. If you need to support those browsers, enable this option.
2025-03-28The CSS -webkit-transform property enables web authors to transform an element in two-dimensional (2D) or three-dimensional (3D) space. For example, you can rotate elements, scale them, skew them, and more. Demo The -webkit-transform property accepts a list of "transform functions" as values. These transform functions have names such as scale(), rotate(), skew(), etc, which accept parameters to determine the level of transformation (for example, the angle to rotate an element).The CSS -webkit-transform property is a proprietary CSS extension that is supported by the WebKit browser engine. WebKit extensions contain the -webkit- prefix, which indicates that it belongs to the WebKit open source framework.Although the -webkit-transform property is not part of the official W3C CSS specification, it is designed to work on browsers that are powered by the WebKit browser engine, such as Apple Safari and Google Chrome. SyntaxThe syntax for the -webkit-transform property is: Where represents one of the transform functions listed below under Accepted Values.Example CodeHere's an example of usage (note that this example also includes other proprietary extensions): Accepted ValuesHere are the accepted values for the -webkit-transform property: none Specifies that no transforms should be applied to the element. This is the default value. transform function One or more of the transform functions below.Transform FunctionsHere is a list of transform functions that you can use with the -webkit-transform property. Transform Function Description matrix() Specifies a 2D transformation in the form of a transformation matrix of six values. Syntax: -webkit-transform: matrix(m11, m12, m21, m22, tX, tY) The parameters m11, m12, m21, m22 represent the elements of a 2x2 matrix in column-major order: 1,12,1 1,22,2 The parameters tX, tY represent the x and y translation elements. Example: -webkit-transform: matrix(1, 0, 0.6, 1, 250, 0); The matrix() transform function is available on the following: Safari 3.1 and later. iOS 2.0 and later. Google Chrome 1.0 and later. matrix3d() Specifies a 3D transformation as a 4 x 4 matrix. Syntax: -webkit-transform: matrix3d(m00, m01, m02, m03, m10, m11, m12, m13, m20, m21, m22, m23, m30, m31, m31, m33) The parameters represent a 4x4 homogeneous matrix of 16 values in column-major order: 0,01,02,03,0 0,11,12,13,1 0,21,22,23,2 0,31,32,33,3 The matrix3d() transform function is available on the following: Safari 4.0.3 and later running on Mac OS X version 10.6 and later. iOS 2.0 and later. Google Chrome 12.0 and later. perspective() Specifies a perspective projection matrix. Syntax: -webkit-transform: perspective(depth) Where depth equals the distance, in pixels, of
2025-04-18Beginners Guide to CSS Animations--> CSS animations are a powerful way to add interactivity and visual interest to your websites. With CSS animations, you can create effects such as fading elements in and out, moving elements around the page, changing the appearance of elements over time, and even simulate complex physics-based effects.To create a CSS animation, you need to do two things:Define the animation keyframes. Keyframes are the different stages of the animation. For each keyframe, you specify the CSS properties that you want to animate and the values of those properties.Apply the animation to an HTML element. Once you have defined your animation keyframes, you can apply the animation to an HTML element using the animation property.Defining animation keyframesAnimation keyframes are defined using the @keyframes at-rule. The @keyframes at-rule takes the name of your animation as its argument. Inside the @keyframes at-rule, you define one or more keyframes.Each keyframe is defined by a percentage value and a set of CSS properties. The percentage value specifies when the keyframe should occur in the animation. The CSS properties specify the values that the element should have at that point in the animation.For example, the following code defines a simple animation that bounces an element up and down:CSS@keyframes bounce { 0% { transform: translateY(0); } 50% { transform: translateY(-10px); } 100% { transform: translateY(0); }}This animation has three keyframes:The first keyframe occurs at 0% of the animation. At this point, the element's transform: translateY() property is set to 0, which keeps the element in its original position.The second keyframe occurs at 50% of the animation. At this point, the element's transform: translateY() property is set to -10px, which moves the element 10 pixels down.The third keyframe occurs at 100% of the animation. At this point, the element's transform: translateY() property is set back to 0, which moves the element back to its original position.Applying animations to HTML elementsOnce you have defined your animation keyframes, you can apply the animation to an HTML element using the animation property. The animation property takes the name of your animation as its value.For example, the following code applies the bounce animation to the .box element:CSS.box:hover { animation: bounce 1s linear;}This code tells the browser to animate the .box element using the bounce animation over a period of 1 second. The linear timing function specifies that the animation should play at a constant speed. You can see the result of this animation below.Animation ResultHover over me to view animation.Animation propertiesIn addition to the animation property, there are a number of other CSS properties that you can use to control your animations. These properties include:animation-duration: Specifies the duration of the animation in seconds.animation-timing-function: Specifies the speed curve of
2025-04-23Does not cause other elements to flow around it like the scale() transform function does. That means an element’s scale does not result in the elements around it reflowing in order to make additional (or less) room available based on the scale of that element.Scaling affects child and descendent elementsAnother thing to note is that the scale property scales all of an element’s descendants. For example, let’s say we have text inside the element. Changing the elements scale scales both the element and the text.Transitions and animationsAnd, yes, we can use scale in CSS transitions and animations. For example, we can make any element smoothly transition between scales on, say, hover:We can even get a little more creative when we combine scale with other independent transform properties, like translate:FallbacksWhile browser support is building for the CSS scale property and other independent transform properties, it’s probably worth checking for support when using scale:.box:hover { transform: scale(2); /* Fallback to this */}@supports (scale: 1) { .box:hover { scale: 2; /* Used if support for `scale` is detected */ }}DemoBrowser supportMore informationCSS Transforms Module Level 2 SpecificationMDN Developer Docs Snippet on Nov 3, 2014 Scale on Hover with Transition Article on Feb 21, 2020 Full Page Background Video Styles Article on Feb 7, 2020 Fun Times With CSS Pixel Art Article on Mar 30, 2020 How They Fit Together: Transform, Translate, Rotate, Scale, and Offset Article on Nov 28, 2018 I Heart CSS Article on Jun 30, 2016 Recreating the Twitter Heart Animation (with One Element, No Images, and No JavaScript)
2025-04-19The translate3d() function in CSS is used to translate, or move, an element in three-dimensional space. The result is a datatype.The translate3d() function results in the transformation, based on the three-dimensional vector [tx, ty, tz]. The coordinates value determine the direction in which the element will move.Possible valuesThe function translate3d() takes the following values as parameter(s).tx: Can be a or value that represents the abscissa (horizontal, x-component) of the translating vector [tx, ty, tz].ty: Can be a or value that represents the ordinate (vertical, y-component) of the translating vector [tx, ty, tz].tz: Can only be a value that represents z-component of the translating vector [tx, ty, tz]. It can not have a value and if given the property containing the transform will be invalid.Syntaxtransform: translate3d(tx, ty, tz);CSS translate3d() - Length ValueFollowing is an example of translate3d() function with the various ways in which length values can be passed to it, i.e., positive and negative values: #container { border: 5px solid black; margin: 25px; } #sample { height: 110px; width: 110px; border: 2px solid black; } .translate-3d-length { transform: translate3d(20px, 30px, 20px); background-color: yellowgreen; } .translate-3d-negative { transform: translate(-20px, -10px, -30px); background-color: tomato; } no translate() applied translate3d(20px, 30px, 20px) translate3d(-20px, -10px, -30px) CSS translate3d() - Combining x-axis and z-axis valuesFollowing is an example of translate3d() function with length values passed to x-axis and z-axis: #container { border: 5px solid black; margin: 25px; } #sample { height: 110px; width: 110px; border: 2px solid black; } .translate-3d-length { transform: translate3d(20px, 0, 20px); background-color: yellowgreen; } no translate3d() translate3d(20px, 0, 20px) no translate3d() CSS translate3d() - Combining y-axis and z-axis valuesFollowing is an example of translate3d() function with length values passed to y-axis and z-axis, along with perspective() value: #container { border: 5px solid black; margin: 25px; } #sample { height: 110px; width: 110px; border: 2px solid black; } .translate-3d-length { transform: perspective(580px) translate3d(0, 30px, 50px); background-color: yellowgreen; } no translate3d() translate3d(0, 30px, 50px) no translate3d()
2025-04-22