Disk management tool
Author: h | 2025-04-25
Open Disk Management Tool - To open the Disk Management tool right-click on the Windows Start button and choose Disk Management. In the Disk Management tool, you should see 3. More info on Wondershare Disk Manager Free: Tool for Disk Partition Management. 2. Causes of Wondershare Disk Manager Free: Tool for Disk Partition Management?. 1. Meaning of Wondershare Disk Manager Free: Tool

Disk management tools for Windows
Repair professionals.Using a keyboard shortcut to open the disk tray offers a convenient and efficient way to access the CD/DVD drive on your Windows 10 computer. Make sure to check your keyboard connections and verify that the CD/DVD drive is correctly connected before seeking further assistance for any persistent issues.Method 6: Using the Disk Management ToolIf the previous methods have not been successful in opening the disk tray on your Windows 10 computer, you can try using the Disk Management tool. This tool allows you to manage the disks and volumes connected to your computer, including the option to eject the disk tray.Here’s how you can use the Disk Management tool to open the disk tray:Press the Windows key + X on your keyboard to open the Power User menu.From the menu, select “Disk Management” to open the Disk Management tool.In the Disk Management window, locate the CD/DVD drive that you want to eject the tray for. It will be listed under the “Volumes” section.Right-click on the CD/DVD drive and select “Eject” from the context menu. This action will send a command to the drive, instructing it to open the disk tray.If the disk tray fails to open using this method, ensure that your CD/DVD drive and Disk Management tool are functioning correctly by following these steps:Check that the CD/DVD drive is properly connected to your computer and receiving power. Make sure the cables are securely plugged in and that the drive is recognized by your system.Confirm that your Disk Management tool is functioning correctly. If you are using a third-party disk management tool, consider using the built-in Disk Management tool in Windows.If the issue persists, consider seeking assistance from technical support or computer repair professionals.Using the Disk Management tool to open the disk tray provides an additional option for managing your CD/DVD drive. If you encounter any difficulties, ensure that the hardware connections are secure and that the Disk Management tool is functioning properly before seeking further assistance.Method 7: Using Third-Party SoftwareIf the built-in methods for opening the disk tray on your Windows 10 computer are not working, you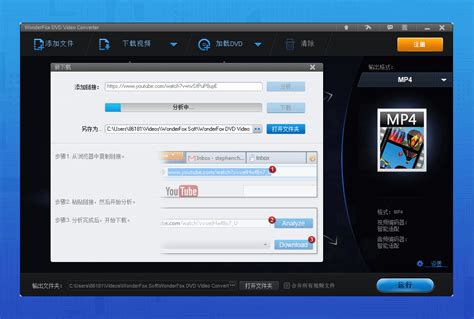
Disk Management Tools and Protection Software Tools
How to Get to Disk Management on Windows 11Accessing Disk Management on Windows 11 is a straightforward process. This tool lets you manage your hard drives and partitions, helping you organize your storage or troubleshoot issues. You can get to Disk Management by simply using a few steps, which involve navigating through the Start menu or using a keyboard shortcut.Step-by-Step Tutorial on How to Get to Disk Management on Windows 11Here, you’ll learn the steps to access Disk Management on Windows 11. Follow these steps, and you’ll be managing your disk drives in no time.Step 1: Open the Start MenuClick on the Start button at the bottom-left corner of your screen.The Start button is the gateway to most of Windows’ features. Clicking it reveals a menu with various options, including settings, installed programs, and quick access to essential system tools.Step 2: Search for Disk ManagementType "Disk Management" into the search bar.Typing "Disk Management" in the search bar will show you the relevant tool in the results. This search function is very efficient and helps you find what you need without digging through menus.Step 3: Select "Create and Format Hard Disk Partitions"Click on "Create and Format Hard Disk Partitions" from the search results.This option directly takes you to the Disk Management tool. Selecting it will open the tool, where you can view and manage your disk drives and partitions.Step 4: Use the Run DialogPress "Win + R" on your keyboard to open the Run dialog box.The Run dialog is a powerful feature in Windows that allows you to open programs, folders, documents, and internet resources quickly.Step 5: Type "diskmgmt.msc" and Press EnterIn the Run dialog box, type "diskmgmt.msc" and hit Enter.This command will directly launch Disk Management without needing to go through the Start menu or search bar. It’s a quick shortcut for those who prefer using keyboard commands.Step 6: Right-Click on the Start ButtonRight-click the Start button and select "Disk Management" from the context menu.This method provides another straightforward way to access Disk Management. Right-clicking the Start button reveals a menu with several quick access tools, including Disk Management.Step 7: Confirm User Account Control (UAC) PromptIf prompted by User Account Control (UAC), click "Yes" to proceed.User Account Control might ask for confirmation before allowing you to access Disk Management. This is a security feature to prevent unauthorized changes to your system.After completing these actions, Disk Management will open, displaying yourFix Wondershare Disk Manager Free: Tool for Disk Partition Management
Simple and user-friendly interface Support basic partition management, including resizing, moving, formatting, creating, and checking partitions. Fix disk error, optimize disk performance, partition recovery and clone partitions, etc.Pros and Cons: Pros Cons Very easy to use Includes lots of useful operations (4K Alignment, Clone, Format) You can preview changes before applying them Additional features are included only in the Pro version Extending the system volume requires a reboot Software Spec: Price: Free. ($19.95 for EaseUS Partition Master Professional) Download Size: 1.87MB (for the Installer)#Free Disk Manager#Free Disk Management Tool#Disk Manager for Windows#FreeWhy Choose EaseUS Partition Master Over Disk ManagementYou have learned about EaseUS free partition software and Windows 10 Disk Management. Look at the table of Windows 10 Disk Management vs EaseUS Partition Master, and you'll learn the differences between these two Windows 10 Disk Management tools: Features Windows 10 Disk Management EaseUS Partition Master Create/Delete/Extend/Shrink/Format partition ✔ ✔ Initialize a new disk - HDD, SSD ✔ ✔ Change drive letter and paths ✔ ✔ Convert MBR to GPT or GPT to MBR without Losing Data ✘ ✔ Merge partitions ✘ ✔ Migrate OS to SSD/HDD ✘ ✔ Convert dynamic disk to basic disk ✘ ✔ Recover lost partition ✘ ✔ Copy disk/partition ✘ ✔ Rebuild MBR ✘ ✔ Reset Windows Password, Repair Boot Issues, etc. ✘ ✔ If you already understand the differences, you can figure out which tool is more suitable for you. Also, don't forget to share this table online to help more of your friends identifying a coool disk manager based on their needs:Top 2. Macrorit Disk Partition ExpertMacrorit Disk Partition's unsoiled user interface makes it one of the best disk management software. It is a powerful free partition program that allows you to extend, create, and format a partition, fix low disk space problems, and. Open Disk Management Tool - To open the Disk Management tool right-click on the Windows Start button and choose Disk Management. In the Disk Management tool, you should see 3. More info on Wondershare Disk Manager Free: Tool for Disk Partition Management. 2. Causes of Wondershare Disk Manager Free: Tool for Disk Partition Management?. 1. Meaning of Wondershare Disk Manager Free: ToolWindows 11 Disk Management tool and best free disk manager
Tips or take a reliable Disk Management free alternative software as recommended in the next part for help:Top 7 Free Disk Management Alternative Tools Windows 10 [Recommends]Why do I still need a Disk Management alternative tool? Here is a list of reasons that'll explain why Windows user need to turn to Disk Management alternative software to manage their disk partitions smartly. If you are with one of the listed issues, follow to get a reliable tool below: Windows suddenly becomes slow The C drive gets full for now reason To increase C drive space and make full use of the disk drives Find a third-party free partition manager for Windows 11 or 10 to execute disk partitioning tasks easier, etc.Top 7 Best Free Disk Management Alternatives in Windows 10There are numerous partitioning managers that one can obtain from the market nowadays. However, not all of the options are suitable for a beginner user or are easy to use. On the basis of this, here we collected 7 handy free Windows 10 disk management tool with high quality for each one of you to select: EaseUS Partition Master Free 🏆 Macrorit Disk Partition Expert Paragon Partition Manager Gparted Cute Partition Manager Active Partition Disk Acronis Disk DirectorIt enables you to create, delete, shrink, expand, format, or merge partitions on your HDD, SSD, or other storage devices. Most modern operating systems contain built-in tools for creating, deleting, or resizing partitions.Top 1. EaseUS Partition Master Free EditionEaseUS Partition Master is the most feature-rich free partition manager designed for Windows 11/10/8.1/8/7. It enables worldwide users to manage their partitions without any data loss with its security confirmation mechanism. For a versatile and secure free Windows 10 disk management software, EaseUS Partition Master must be your best choice. Feature List: All-in-one free disk management utilityWondershare Disk Manager: Handy tool for disk - AlternativeTo
System’s hard drives and partitions. You can now perform various tasks such as creating partitions, extending volumes, or changing drive letters.Tips for Getting to Disk Management on Windows 11Use the search bar for quick access.Bookmark or pin the Disk Management tool for even faster access in the future.Familiarize yourself with the "Win + X" menu for quick access to essential tools.Regularly check Disk Management to keep an eye on your storage.Use the "Run" command for quick access if you prefer keyboard shortcuts.Frequently Asked QuestionsWhat is Disk Management?Disk Management is a built-in Windows tool that lets you manage your hard drives and partitions.It helps you perform tasks like creating, deleting, formatting, and resizing partitions on your hard drives. It is essential for managing your computer’s storage efficiently.Can I use Disk Management to format a drive?Yes, you can use Disk Management to format a drive.Formatting a drive erases all data on it and sets up a new file system. This can be useful for preparing a drive for new data or troubleshooting issues.Is it safe to use Disk Management?Yes, but be cautious as changes can’t be undone easily.Making changes in Disk Management can affect your data. Always ensure you have backups before making any modifications.How do I create a new partition using Disk Management?Right-click on an unallocated space and select "New Simple Volume."This will start a wizard that guides you through the process of creating a new partition, including setting its size and file system.Can I change drive letters using Disk Management?Yes, right-click the drive and select "Change Drive Letter and Paths."This option allows you to assign a different letter to a drive, which can be useful for organizing your storage or resolving conflicts.SummaryOpen the Start Menu.Search for Disk Management.Select "Create and Format Hard Disk Partitions."Use the Run dialog.Type "diskmgmt.msc" and press Enter.Right-click the Start button.Confirm User Account Control (UAC) prompt.ConclusionAccessing Disk Management on Windows 11 is a breeze with these steps. Whether you are a seasoned techie or just starting out, knowing how to get to Disk Management is a valuable skill. This tool lets you keep your storage in check, ensuring you can handle everything from creating new partitions to resolving disk-related issues.For further reading, you might explore other Windows 11 features that can enhance your experience. Feel free to dive into Microsoft’s official documentation for a deeper understanding of Disk Management and other system tools.Now, go ahead and exploreTop 5 Disk Management Tools for
Extra Subst is a software that streamlines accessing frequently used folders and simplifies the creation, editing, ... This software summary describes a feature-rich file manager with a customizable tabbed interface, fast FTP client, ... Rename Us Pro is a powerful batch file renaming utility that enables users to rename or ... Rename Us is a free tool for renaming or copying multiple files simultaneously, making it a ... DiskBoss software automates disk and file management tasks by applying rules to disks, NAS storage, and ... DiskBoss Pro is a software that streamlines file and disk management through automated rule-based operations. It ... DiskBoss Ultimate is a storage management software that automates disk and file management processes. With its ... DiskSavvy is a user-friendly software that offers efficient disk space analysis and storage management for multiple ... DiskSavvy Pro is a speedy and easy-to-use software for analyzing disk space on network shares, NAS ... Disk Pulse is a free and user-friendly software that monitors disk activity in real-time, detecting updates ... January 16, 2004 The software is a disk and file cataloging tool that helps organize various types of storage media including CDs, ZIPs, MOs, and hard disks. It provides easy browsing and searching of directory information for offline and offsite storage media without needing to mount them. Version 2.12 License Shareware $10 Platform Windows Supported Languages English Introducing a powerful disk cataloging and file cataloging tool that allows you to easily organize all your CD-ROMs, ZIP drives, MO disks, floppy disks, hard disks, and other storage media. With this tool, you can browse and search directory information of all your offline and offsite storage media without having to mount them. This software supports scanning inside archive files such as ZIP, LZH, CAB, RAR, and TAR. In addition, it provides directory. Open Disk Management Tool - To open the Disk Management tool right-click on the Windows Start button and choose Disk Management. In the Disk Management tool, you should seeComments
Repair professionals.Using a keyboard shortcut to open the disk tray offers a convenient and efficient way to access the CD/DVD drive on your Windows 10 computer. Make sure to check your keyboard connections and verify that the CD/DVD drive is correctly connected before seeking further assistance for any persistent issues.Method 6: Using the Disk Management ToolIf the previous methods have not been successful in opening the disk tray on your Windows 10 computer, you can try using the Disk Management tool. This tool allows you to manage the disks and volumes connected to your computer, including the option to eject the disk tray.Here’s how you can use the Disk Management tool to open the disk tray:Press the Windows key + X on your keyboard to open the Power User menu.From the menu, select “Disk Management” to open the Disk Management tool.In the Disk Management window, locate the CD/DVD drive that you want to eject the tray for. It will be listed under the “Volumes” section.Right-click on the CD/DVD drive and select “Eject” from the context menu. This action will send a command to the drive, instructing it to open the disk tray.If the disk tray fails to open using this method, ensure that your CD/DVD drive and Disk Management tool are functioning correctly by following these steps:Check that the CD/DVD drive is properly connected to your computer and receiving power. Make sure the cables are securely plugged in and that the drive is recognized by your system.Confirm that your Disk Management tool is functioning correctly. If you are using a third-party disk management tool, consider using the built-in Disk Management tool in Windows.If the issue persists, consider seeking assistance from technical support or computer repair professionals.Using the Disk Management tool to open the disk tray provides an additional option for managing your CD/DVD drive. If you encounter any difficulties, ensure that the hardware connections are secure and that the Disk Management tool is functioning properly before seeking further assistance.Method 7: Using Third-Party SoftwareIf the built-in methods for opening the disk tray on your Windows 10 computer are not working, you
2025-04-02How to Get to Disk Management on Windows 11Accessing Disk Management on Windows 11 is a straightforward process. This tool lets you manage your hard drives and partitions, helping you organize your storage or troubleshoot issues. You can get to Disk Management by simply using a few steps, which involve navigating through the Start menu or using a keyboard shortcut.Step-by-Step Tutorial on How to Get to Disk Management on Windows 11Here, you’ll learn the steps to access Disk Management on Windows 11. Follow these steps, and you’ll be managing your disk drives in no time.Step 1: Open the Start MenuClick on the Start button at the bottom-left corner of your screen.The Start button is the gateway to most of Windows’ features. Clicking it reveals a menu with various options, including settings, installed programs, and quick access to essential system tools.Step 2: Search for Disk ManagementType "Disk Management" into the search bar.Typing "Disk Management" in the search bar will show you the relevant tool in the results. This search function is very efficient and helps you find what you need without digging through menus.Step 3: Select "Create and Format Hard Disk Partitions"Click on "Create and Format Hard Disk Partitions" from the search results.This option directly takes you to the Disk Management tool. Selecting it will open the tool, where you can view and manage your disk drives and partitions.Step 4: Use the Run DialogPress "Win + R" on your keyboard to open the Run dialog box.The Run dialog is a powerful feature in Windows that allows you to open programs, folders, documents, and internet resources quickly.Step 5: Type "diskmgmt.msc" and Press EnterIn the Run dialog box, type "diskmgmt.msc" and hit Enter.This command will directly launch Disk Management without needing to go through the Start menu or search bar. It’s a quick shortcut for those who prefer using keyboard commands.Step 6: Right-Click on the Start ButtonRight-click the Start button and select "Disk Management" from the context menu.This method provides another straightforward way to access Disk Management. Right-clicking the Start button reveals a menu with several quick access tools, including Disk Management.Step 7: Confirm User Account Control (UAC) PromptIf prompted by User Account Control (UAC), click "Yes" to proceed.User Account Control might ask for confirmation before allowing you to access Disk Management. This is a security feature to prevent unauthorized changes to your system.After completing these actions, Disk Management will open, displaying your
2025-04-13Tips or take a reliable Disk Management free alternative software as recommended in the next part for help:Top 7 Free Disk Management Alternative Tools Windows 10 [Recommends]Why do I still need a Disk Management alternative tool? Here is a list of reasons that'll explain why Windows user need to turn to Disk Management alternative software to manage their disk partitions smartly. If you are with one of the listed issues, follow to get a reliable tool below: Windows suddenly becomes slow The C drive gets full for now reason To increase C drive space and make full use of the disk drives Find a third-party free partition manager for Windows 11 or 10 to execute disk partitioning tasks easier, etc.Top 7 Best Free Disk Management Alternatives in Windows 10There are numerous partitioning managers that one can obtain from the market nowadays. However, not all of the options are suitable for a beginner user or are easy to use. On the basis of this, here we collected 7 handy free Windows 10 disk management tool with high quality for each one of you to select: EaseUS Partition Master Free 🏆 Macrorit Disk Partition Expert Paragon Partition Manager Gparted Cute Partition Manager Active Partition Disk Acronis Disk DirectorIt enables you to create, delete, shrink, expand, format, or merge partitions on your HDD, SSD, or other storage devices. Most modern operating systems contain built-in tools for creating, deleting, or resizing partitions.Top 1. EaseUS Partition Master Free EditionEaseUS Partition Master is the most feature-rich free partition manager designed for Windows 11/10/8.1/8/7. It enables worldwide users to manage their partitions without any data loss with its security confirmation mechanism. For a versatile and secure free Windows 10 disk management software, EaseUS Partition Master must be your best choice. Feature List: All-in-one free disk management utility
2025-04-05System’s hard drives and partitions. You can now perform various tasks such as creating partitions, extending volumes, or changing drive letters.Tips for Getting to Disk Management on Windows 11Use the search bar for quick access.Bookmark or pin the Disk Management tool for even faster access in the future.Familiarize yourself with the "Win + X" menu for quick access to essential tools.Regularly check Disk Management to keep an eye on your storage.Use the "Run" command for quick access if you prefer keyboard shortcuts.Frequently Asked QuestionsWhat is Disk Management?Disk Management is a built-in Windows tool that lets you manage your hard drives and partitions.It helps you perform tasks like creating, deleting, formatting, and resizing partitions on your hard drives. It is essential for managing your computer’s storage efficiently.Can I use Disk Management to format a drive?Yes, you can use Disk Management to format a drive.Formatting a drive erases all data on it and sets up a new file system. This can be useful for preparing a drive for new data or troubleshooting issues.Is it safe to use Disk Management?Yes, but be cautious as changes can’t be undone easily.Making changes in Disk Management can affect your data. Always ensure you have backups before making any modifications.How do I create a new partition using Disk Management?Right-click on an unallocated space and select "New Simple Volume."This will start a wizard that guides you through the process of creating a new partition, including setting its size and file system.Can I change drive letters using Disk Management?Yes, right-click the drive and select "Change Drive Letter and Paths."This option allows you to assign a different letter to a drive, which can be useful for organizing your storage or resolving conflicts.SummaryOpen the Start Menu.Search for Disk Management.Select "Create and Format Hard Disk Partitions."Use the Run dialog.Type "diskmgmt.msc" and press Enter.Right-click the Start button.Confirm User Account Control (UAC) prompt.ConclusionAccessing Disk Management on Windows 11 is a breeze with these steps. Whether you are a seasoned techie or just starting out, knowing how to get to Disk Management is a valuable skill. This tool lets you keep your storage in check, ensuring you can handle everything from creating new partitions to resolving disk-related issues.For further reading, you might explore other Windows 11 features that can enhance your experience. Feel free to dive into Microsoft’s official documentation for a deeper understanding of Disk Management and other system tools.Now, go ahead and explore
2025-04-22Windows 11 Sign in to your How-To Geek account \n\n ""> Hannah Stryker / How-To Geek Quick Links Open Disk Management through the Computer Management Menu Search Disk Management in the Start Menu Use Power User Menu to Run Disk Management Open Disk Management through the Run Menu Use Command Prompt or PowerShell to Launch Disk Management Summary Open Disk Management easily through the Computer Management Menu by searching "Computer management" in the Start menu and clicking on "Disk Management" under "Storage." Alternatively, you can search for Disk Management directly in the Start menu and select "Create and manage hard disk partitions" as the search result. Use the Power User Menu by pressing Windows+x or right-clicking the Start button, and then clicking "Disk Management" to access Disk Manager quickly. Disk Management is a utility found in Windows 10 and 11. It is used to initialize hard drives, create, resize, or delete partitions, change drive letters, and more. Find out five ways to open it here. To access Disk Management through the Computer Management tool, click the Start button, type "Computer management" into the search bar, and hit Enter or click "Open." Click "Storage" in the Computer Management window if it isn't expanded, then click on "Disk Management." If you want to bypass the Computer Management window, you can just search for Disk Management directly. There are some differences between the user interfaces of Windows 10 and Windows 11 — in this case, it doesn't change the steps, so don't worry about it too much. Click the Start button, type "disk management" into the search bar, and then hit Enter or click "Open." The search result displayed will not be Disk Management, it will be "Create and manage hard disk partitions." If you want to use the Power User Menu to access Disk Manager you can hit Windows+x or right-click the Start button, and then click "Disk Management." Disk Management can be launched from the run window as well. Hit Windows+R, type "diskmgmt.msc" into the box, and then click "Ok." Use Command Prompt or PowerShell to Launch Disk Management You can also start Disk Management from a command line if you'd like — click the Start button, type "cmd" or "powershell" into the search bar, and then hit Enter. (You can also launch Windows Terminal on Windows 11.) Type diskmgmt.msc in Command Prompt or PowerShell, and then hit Enter. Disk Management should open immediately. Disk Management is a useful tool for managing partitions, and it is worth familiarizing yourself with it. Be careful not to accidentally delete any partitions though.
2025-04-12